1 How to Disable Fast User Switching or Enable it with the Local Group Policy Editor2 How to Enable or Disable Fast User Switching with Regedit3 How to Enable or Disable Switch User in Windows 10 via CMD
The interface can be accessed on most PC’s by clicking the profile icon, via the “ALT + F4” hotkey or via the Windows 10 lock screen. Some users find that the Windows 10 switch user option is missing. This often happens because someone has disabled the feature, and there are some good reasons for doing so. While fast user switching is useful, you can run into problems when trying to shut your PC down or run software that is already active on the other account. Fast user switching performance is also a topic of hot debate, with signed-in accounts sometimes still using CPU and RAM. As a result, we’re going to show you how to disable fast user switching, but we’ll also cover enabling it if Windows 10 switch user is missing.
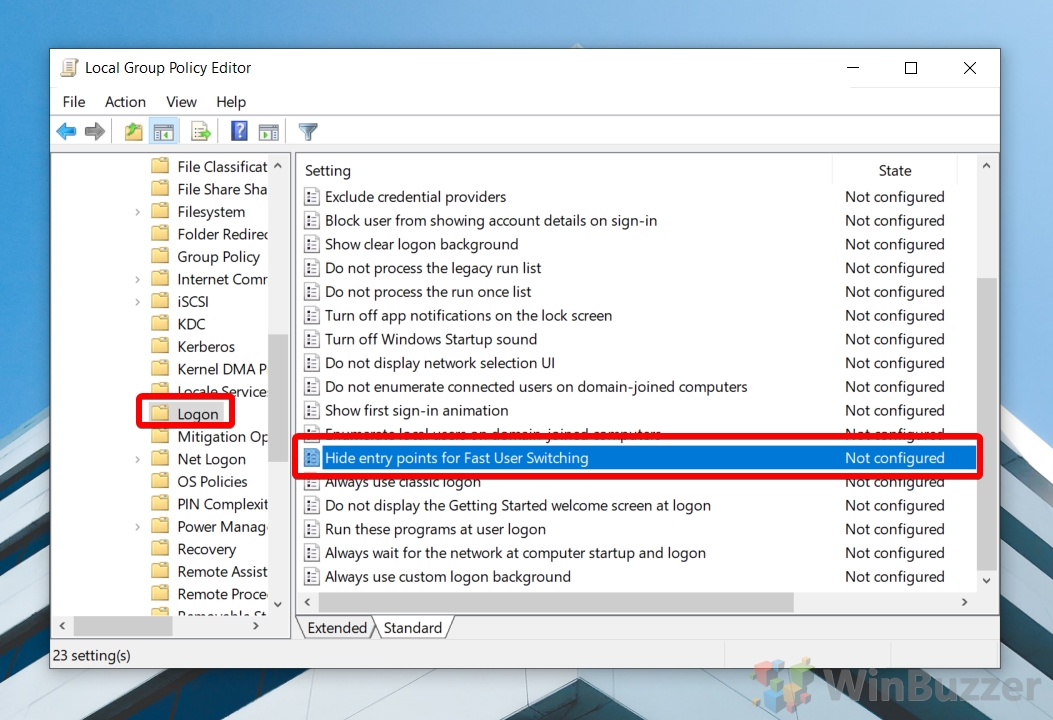
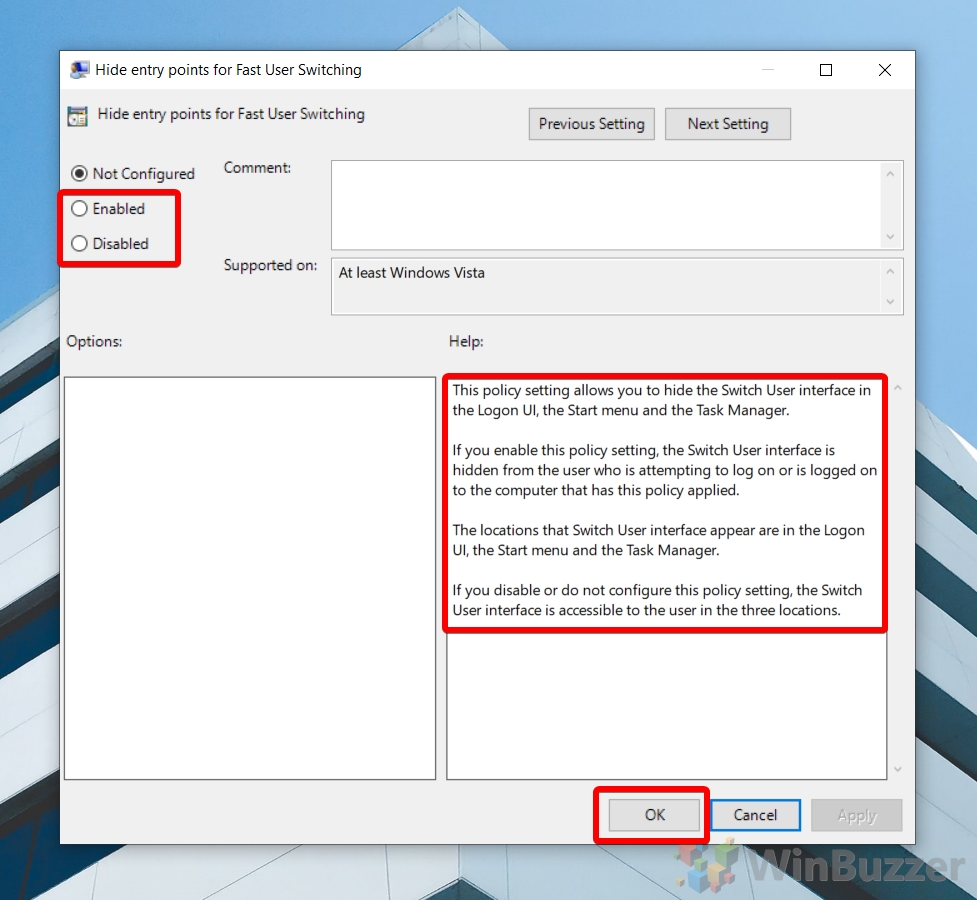
How to Disable Fast User Switching or Enable it with the Local Group Policy Editor
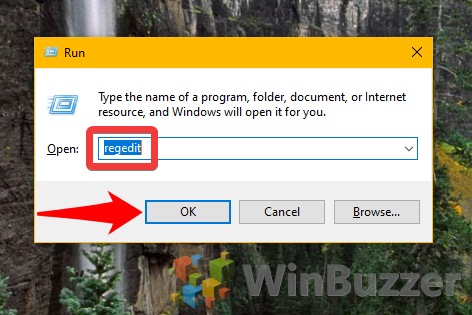
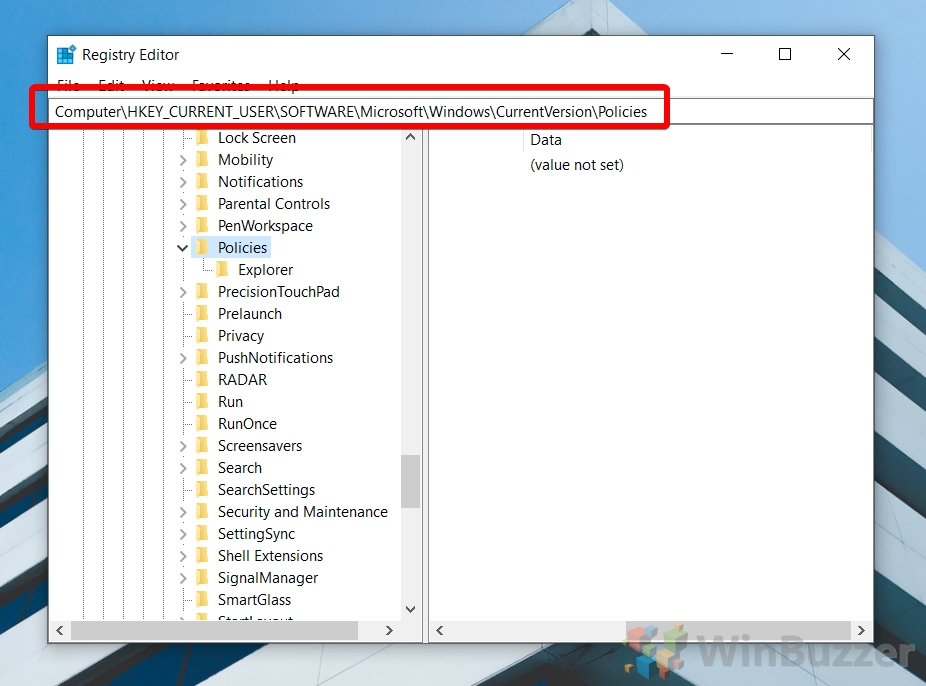
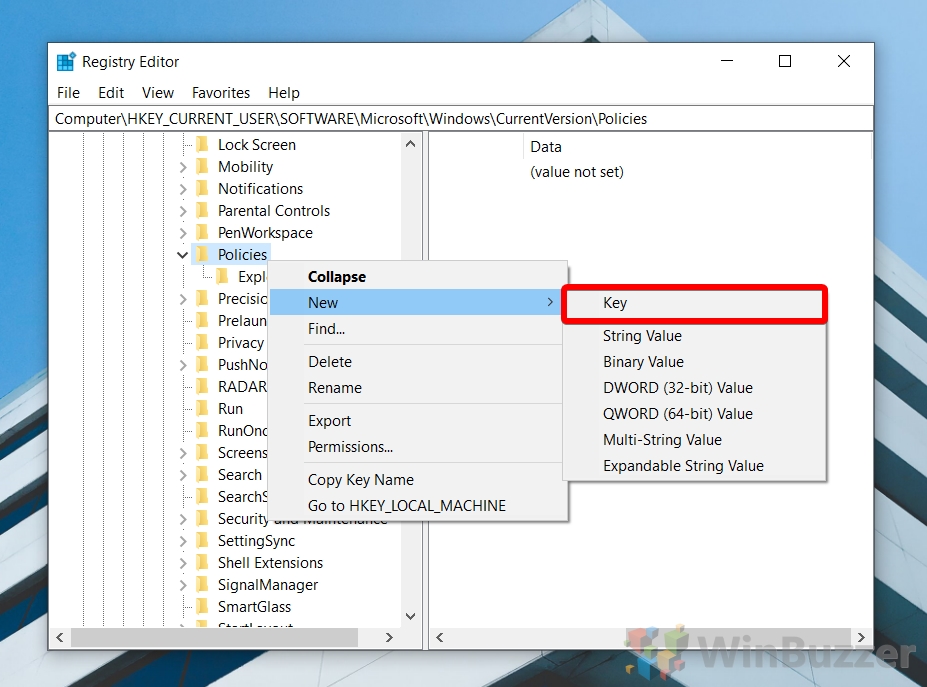
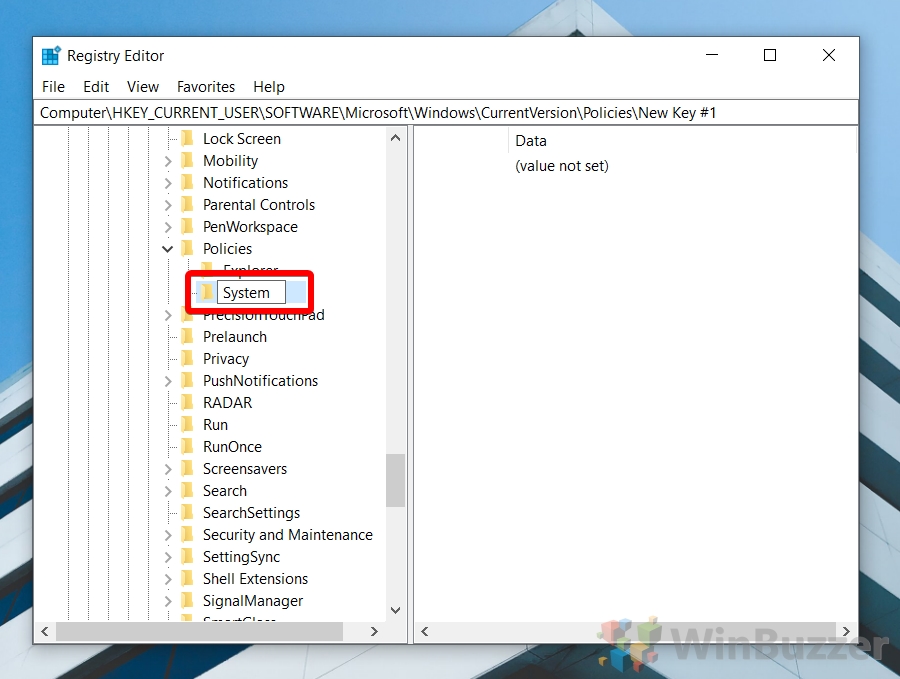
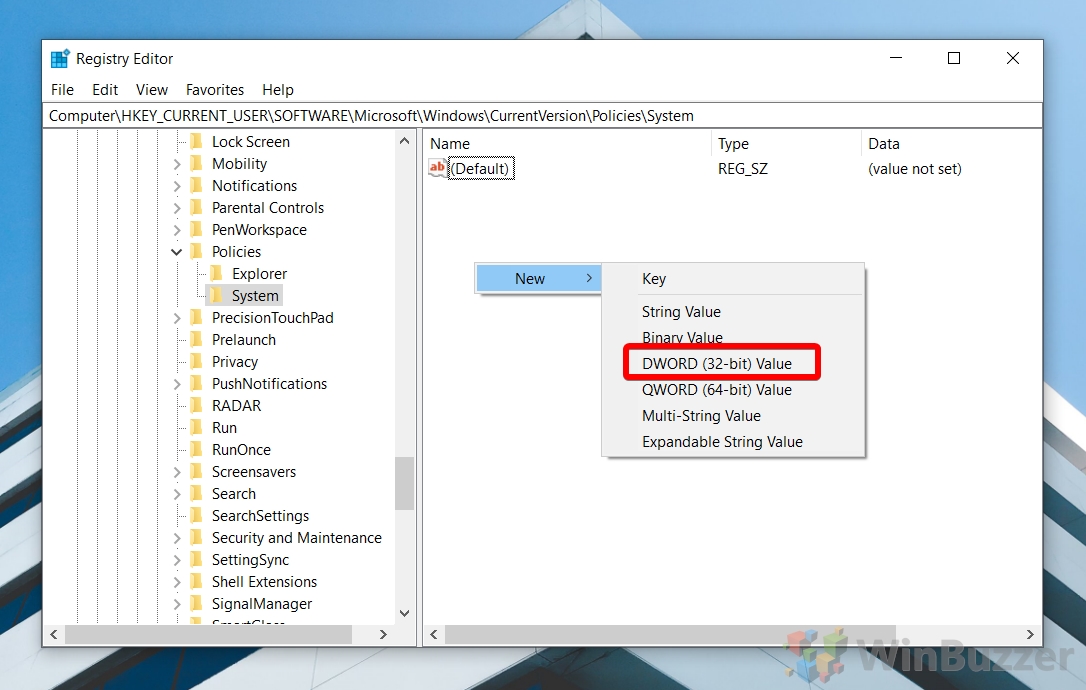
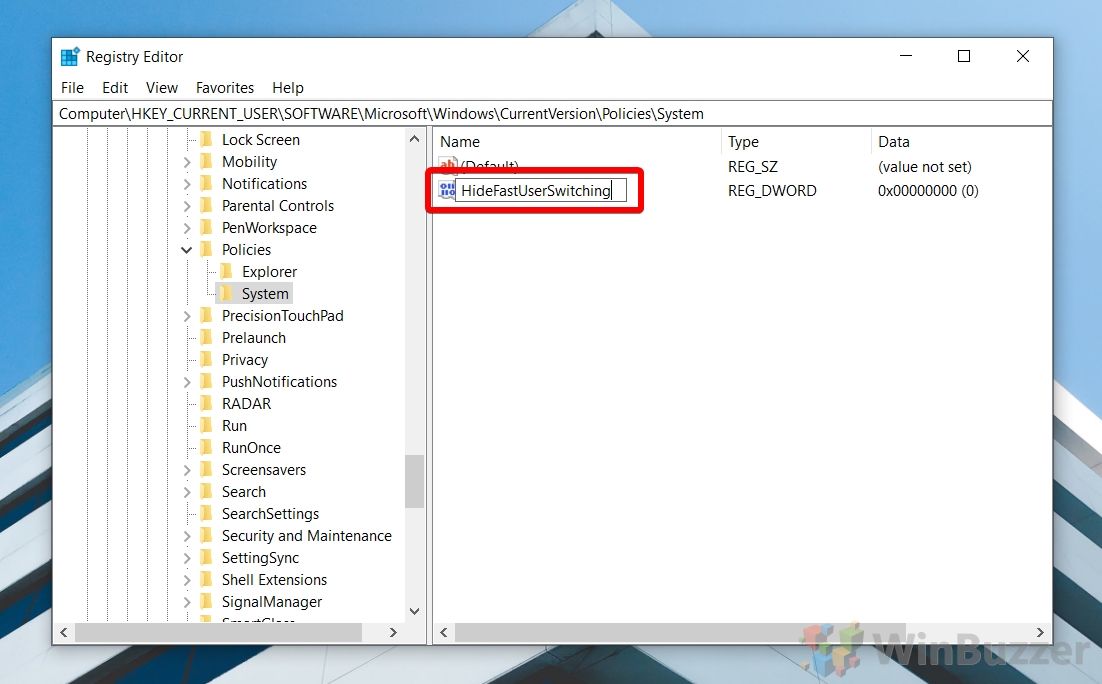
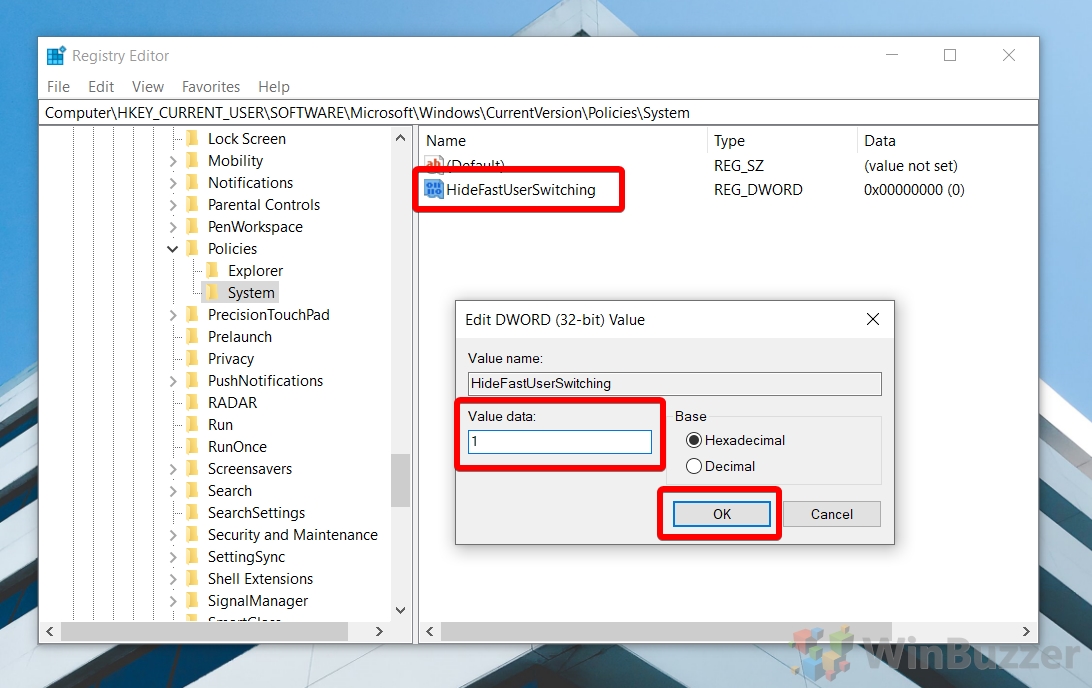
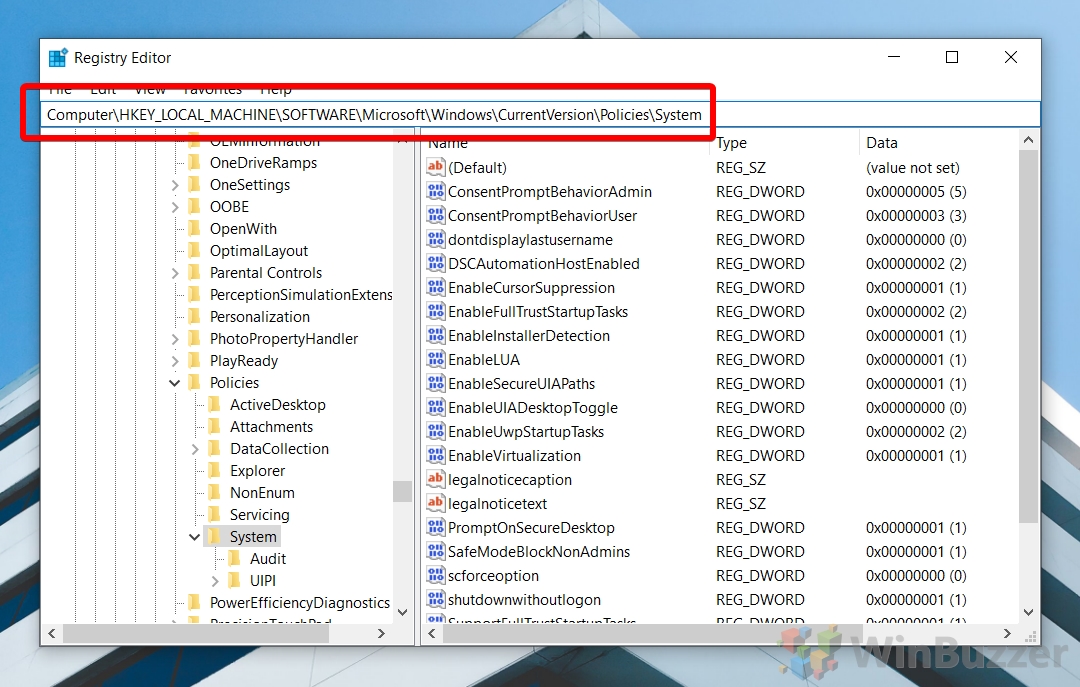
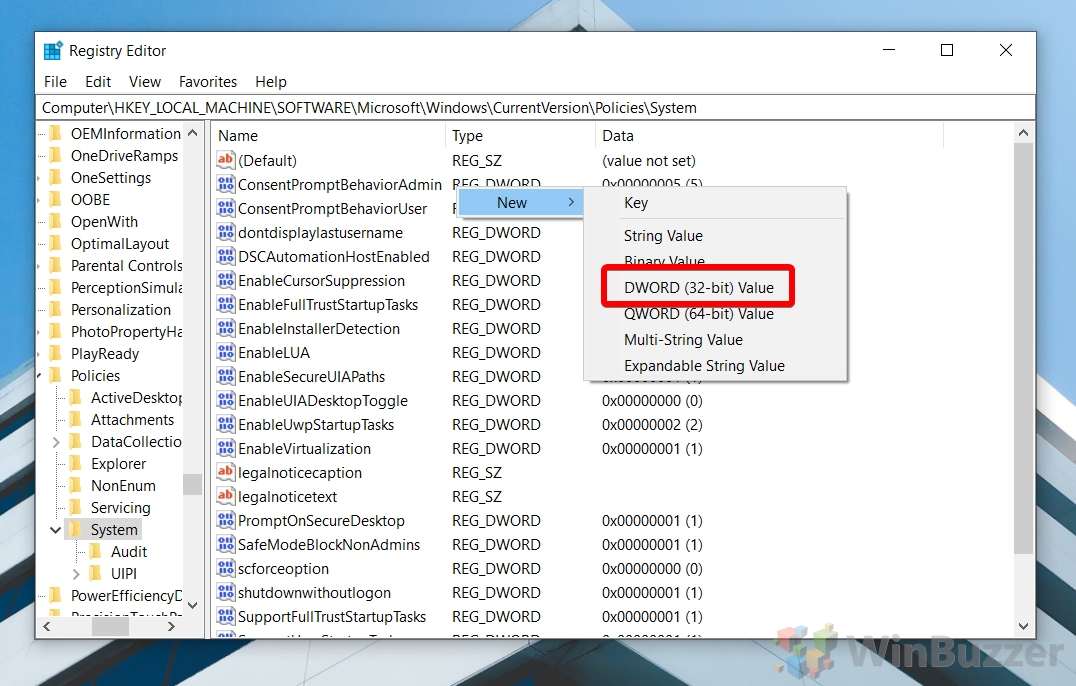
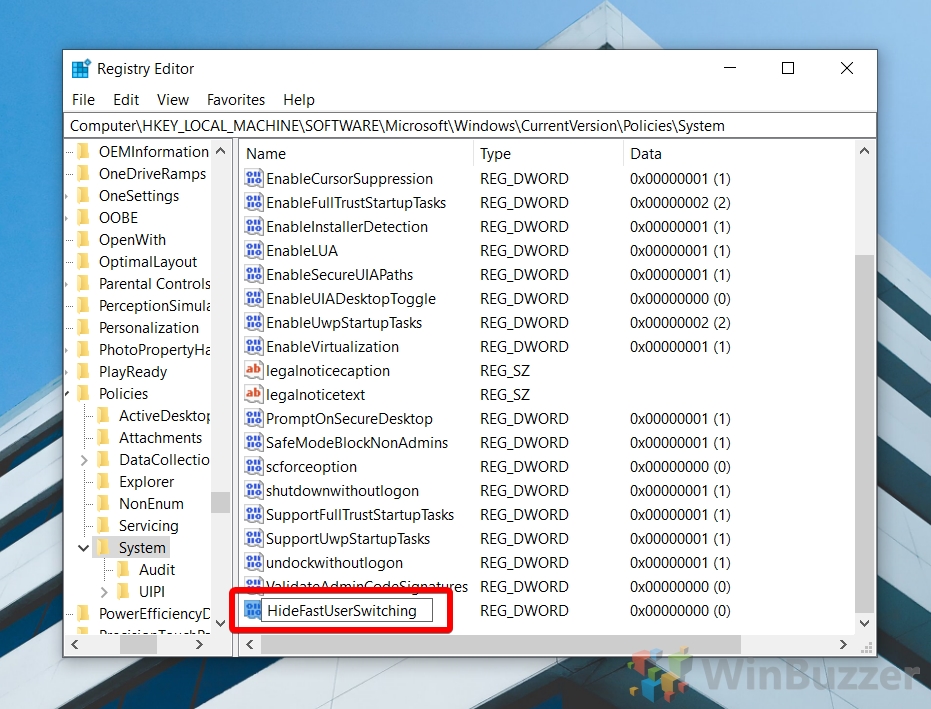
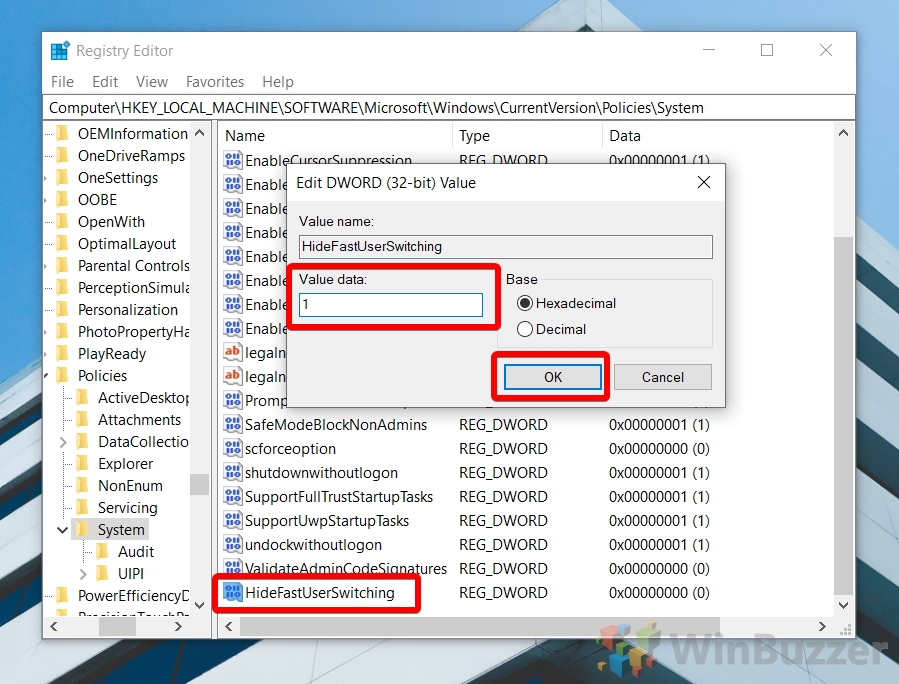
How to Enable or Disable Fast User Switching with Regedit
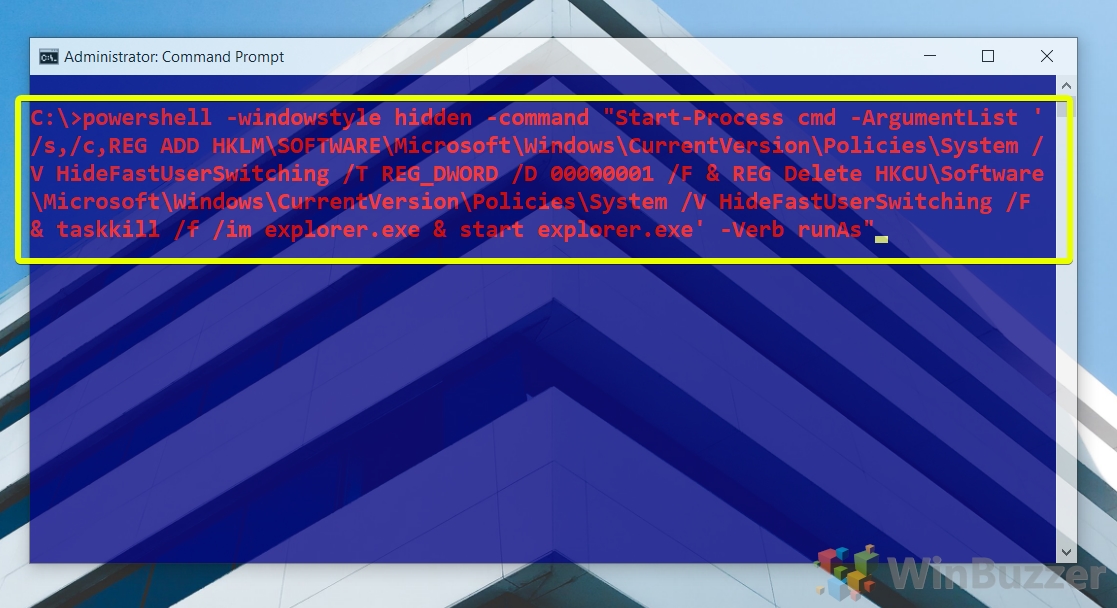
How to Enable or Disable Switch User in Windows 10 via CMD
If you found this tutorial useful, consider reading our guides on how to disable the lock screen and how to configure secure sign-in. To enable it, copy the following command, right-click to paste into CMD, then press “Enter”.


